Monday, June 30, 2014

Can I brag a minute?


You see before you my inspiration. 

French (or any European country) apartments filled with trim work that's probably been there for centuries.  It doesn't matter if the decor is old-world, modern, eclectic or truly country french.  It's those moulding filled walls that are the starting point for character. 

I decided to do this to our new place and knew I couldn't afford to hire it done, so I set out to do it myself. 

This was a "learn-as-you-go" adventure and I must say I'm truly proud of the results!!!  There's still lots more to do, but A LOT has been done!! 

I have no idea why these pictures are out of order.  I wish I know how to operate this darn blog! lol


"Dead-end" during.
Dining walls after.
"Dead-end" after.


Dining room during.


Once you go black!

No make-up, Sunday morning.
Several years ago I fell in love with black doors!  I think I was looking at a magazine and I'm sure it was before Pinterest days.  I didn't act on it at the time, but knew some day....some place...I would have me some black doors.

A few months ago I had a conversation about this with a nurse at my doctor's office.  We were discussing decor because she and I both are closet designers.  She said her "real" designer sister paints doors black in many of her designs and uses a Sherwin Williams color called Iron Ore.  She said to not even shop around, this would be the perfect shade.

I'm not usually one to accept things like that without some research, but by the time I was ready to buy the paint, I had also decided I would trust the advice. 

I'm soooooo happy I did!  I LOVE the color!  It's not grey, it's not brown, it's not black, it's perfect!!!  Look at this foyer!  All the trim is done and the walls are painted and the door is "black".  I'm shopping for some things like furniture and mirrors, but for now, I'm very pleased!

The walls in the living room and dining room are Pensive Sky by Behr.  Sometimes it looks grey and sometimes a true baby blue.  The crown and baseboards are a true white.

Off to paint the rest of the doors, because.....once you go black.....!!!

Back to sanding those walls!

Look closely, stripes still there.
Remember when I mentioned the dining room walls having texture that I had to sand off?  Click here if you need to catch up.  I bought a rotary sander and spent quite some time taking that texture off.  All that was left were the stripes that had been painted on.  I could just paint over that....right?

WRONG!!!  After weeks of putting trim up and feeling like I was about finished with these walls, I started painting over stripes and they showed through!  Now what?  I've got trim all over the walls, which will prevent me from being able to sand them down again like before.  I've also got the rest of the condo to think about.  Sanding creates a huge mess and the place was basically empty the first time. 

I didn't have a choice.  I had to sand before I could paint.  Most projects I look forward to but, I've done this one before and I don't want to do it again.  Oh well, got to.


Sanding "tent" and left-over trim on floor.

I decided it would be worth the trouble to build some "sanding tents".  After taping plastic to the ceiling, I went about using the electric sander on the large sections.  After that, I used a sanding sponge on the small sections between the trim.  The tents worked and kept the dust out of the rest of the house!
 
What a job.  The worst part, is that you can still see stripes in certain lighting, but it's as good as I can get it now, SO TIME TO PAINT!!!!!!!!!


You can see the finished look to the left.


Sunday, May 25, 2014

Let's go to the bedroom and strip.

Excited?  You should be!

So the master bedroom had a very special wall.  A wallpapered wall.  Wallpaper had been cut into rectangles and put up on a wall. 

I have to strip this wall.  Please help me.

Black backed paper?

Have you ever stripped wallpaper?  There's three steps. 

  1. remove the front paper part
  2. remove the backing paper part
  3. wash the glue off the wall
I've done this many times before.  The easiest way is to spray warm water on it and start scraping and peeling.  The highlight of the task is when a huge piece of paper peels off in one sheet!  Unfortunately, when you cut it into rectangles before installing it, there are no huge pieces.  Like other projects, I thought this could be done in an afternoon.  When it was all said and done, it was about 36 hours of work. 


I had to.


The paper had a foil facing in a kind of wood look.  So the foil wasn't solid and I assume that's why it didn't come off in big sheets.  I got one rectangle to come off as a complete piece and it was at the very end.  Also the backing paper was black....something I've never seen before.....and as it got wet, it created this black mess.  Ugh.  This was a tough one. 

Like other projects, it did get done and felt so good! 

Now to pick a paint color.  Our bed is something we brought with us, so we need to work with an espresso colored frame and light blue/grey fabric.  The living and dining room area will be Pensive Sky by Behr.  The master bath is a very white/blue I created myself.  I need something neutral for the bedroom. 

I finally found a taupe/grey/beige color that is perfect.  It's Chocolate Froth by Behr.  It's soooo soft and soothing.  We have white drapes and the trim is being painted white.


I love the color and with our new wall mounted, swing-arm lamps and new nightstands and dresser, the bedroom is coming together.  I still need art and a mirror. 

By the way, I found the lamps for $20 each at the Habitat for Humanity ReStore here in Atlanta, but they had no shades.  I found shades at Target for $14 each, but they wouldn't fit.   I ended up getting shades at a lighting store for $45 each!  I could have bought new lights.  Oy. 

I wish you could see the color in this photo.  Colors just don't photograph well, or at least with a smart phone they don't.  Sorry.


New nightstands/dresser and Chocolate Froth paint!

Will this ever be finished?????

The bar is set too high, but I try!
My very first post was about my obsession, click here to referrence where this whole thing started and where I want it to go. 

One of the main factors in making a room feel French is the trimwork on the walls and ceilings.  You have work with what you have, so I set out to fill the living and dining rooms with as much trim as I could. 

I knew hiring someone to do this would be out of my budget, so I have no other option than to do it myself.

 No, I haven't ever hung trim before.  No, I don't know how to use a compound miter saw.  No, I don't know how to use a brad nailer.  No, I don't know how to use an air compressor.

No problem.  That's what YouTube is for, right?  No kidding.  I borrowed the tools and watched countless videos on the subjects! 

Miter saw on our balcony.
The first step was to put crown moulding in the dining room.  The living room and bedrooms already had crown, so the dining room had come catching up to do. 

As mentioned in a previous post, the dining room had a paint treatment that you could see AND feel.  The striped walls also had a heavy texture.  I bought a hand-held orbital sander and spent several hours taking that texture off.  I look forward to painting over those stripes, but trim is next. 


The new table became the work station. 
We started hanging crown and realized caulk was going to have to hide a multitude of sins!  That's okay, we got it up and then jumped on to the chair rail.  It was rewarding to see it going up, but nothing felt as good as completing what's called a "dead end" in moulding.  It's where moulding ends, but there's no wall for it to run into.  You have to create an "ending".  

Impressed, aren't you? 

Crown and chair rail complete!!
The chair rail had to continue into the living room and so was a pretty big job.  I won't begin to tell you how many times we had to do a piece over, or rely on caulk to hide things like uneven walls, but I think it turned out great!

Okay, now for the real transformation trim......this should be a snap!!!  I got this!!!  I can get this done in the afternoons before the hubby even gets home!!! 

OMG.

First I had to measure for this small, inexpensive trim and go buy it.  Let's see, measure, measure, measure.  Wait, that's over 1000 feet.  Can't be right.  I'll measure again tomorrow. 

Yep.  Over 1000 feet.  No matter how cheap it is per foot, anything multiplied by 1000 is A LOT!!!  Holy freaking cow! 

Uh and yeah, Home Depot doesn't just keep over 1000' of any trim in stock.  You can't just go in the store, grab one of those crazy flat carts and load up 1000' of trim. 

Who would even think you could?  Me, that's who.  I totally did not think that through.  Did I think it would fit in my suv...my small suv? 

Turns out you have to order it from Home Depot and if it's over $45, they ship it for free!!  I know!  Yes, it was over $45.  Don't ask. 

After many, many, many hours, I finally finished this trim work!  At times, I regretted starting it.  It was as if I would never be finished.  It's back-breaking, tedious work. 

Do I regret it now?  H. E. Double hockey sticks NO!  I love it and it's not even painted yet!!! 

There's no time to relax though, I now have to caulk over 1000 feet of trim.  Will this ever be finished?


That's a lot of squares!


This may be my favorite part. 


I'm calling this finished!!!

The Master Bath.  Aaahhhh. 

Master bathrooms are supposed to be like spas, right.  A retreat.  An escape.  A respite. 

Our master bath is all of those things, mainly because it's finished and that makes me feel good!!!!!

The paint turned out perfect.  The lights are just what I wanted, although if an electrician happens to come in I may ask them to be moved closer to the mirror. 

Remember my rant about stupid man decisions?  This bathroom has a separate shower and bath.  The bath has a shower head and used to have a shower curtain rod!  Why?  What dumb *ss man decided to spend good money on those unnecessary things?  Things I have to un-do.  Okay, I'm not un-doing the actual shower head.  Not sure what that would involve, but I do know there is a pipe coming straight through marble and that can't be an easy fix.  Shower caulk can only fill a hole to a certain size.

It's finished!!!!

I did take down the shower rod.  It was put up with screws, which had plastic wall anchors to hold them.  Blue plastic wall anchors.  Blue plastic wall anchors that could NOT be ignored.  Sorry, no picture of those, but I had some difficulty getting those out of the wall.  I tried pushing them in and tried pulling them out, but was afraid of breaking the marble. 

Darryl to the rescue!  My friend Darryl said "just put a screw part-way back in the anchor and pull them out".  Duh.  Worked like a charm and after caulking the holes, you can't even see they were there!!! The picture here proves it. Love projects with happy endings!!!

 He's a Solution Solver!!  That's a double positive!!!

I'm happy with the bath and other than some accessories that could come or go.......


IT'S FINISHED!!!!!!!

One room down and only 6 more to go!!!

Tuesday, April 29, 2014

New lights, new paint!!!!!!

I wish the lights were closer to the mirror.  Another project?

 
I got my new bathroom lights and got the walls painted!!! 

My last post showed you the super fancy lights and lovely paint treatment that I couldn't wait to change.  I wanted the walls to be a pale blue and was afraid of getting a color that looked like a baby boy's room.  My last blue bathroom was Rhino by Behr, which is the same as Restoration Hardware's Silver Sage.  It was pretty, but too dark for this room.

I love the color Silver Drop by Behr, but it's almost no color at all, so I took a gallon of  that and added a sample size of the Rhino to it!  I love it!!!

It's amazing how much nicer the marble and cabinets look with the new wall color.  I never get tired of how color changes things!

I still want to get rid of all the gold in this room.  The shower door hinges and door bar would have already been replaced if they weren't over $200!  They will wait! lol 

Now to go paint something else........


New towel bars and placed over the toilet.
New pic in place of old towel bar.  You can see the color better here.

Friday, April 25, 2014

Men are stupid!

I don't have pictures of my forehead and I may not have actually gotten bruised, but the lights in the master bathroom are dangerous!!! 


The placement of the lights is just bad.  They are too far away from the mirror on the side walls, so that when you lean forward to apply makeup, they are behind you.  Some stupid man made that call.  I bet his mascara is always a mess!!


Okay, not only are the lights in a bad location, the ones in this place protruded from the wall about 7 inches.  Who does that?  Every time I washed my face or put my contacts in, I hit my head on them!!! 


Have I mentioned that were just my style?  No?  Here's why.....
 
Oh my!

Um, yea.  Not for me.  Also take a look at this paint.  It wouldn't be bad, if it wasn't almost exactly the same color as the marble and cabinets in the room.  I can't wait to paint over it!  The next picture shows the light from the side, showing the danger I face.....get it?  Every time I wash my face! You can also see the marble color over the tub.  I love the marble, but it just dissapears with this paint color and treatment.  See my blue tape?  I'm ready!!!


Only a man would place lights here and I'm going to assume it was a man that picked this one out

Friday, April 18, 2014

First things first!


See the difference in what the ceilings were and what they are now? 
The first thing I needed to tackle in our new place was the ceilings and fans.  I posted about painting the ceiling fans, if you missed it click here.  Once those were done, I started on the ceilings.  I did most of them before we actually moved in.


They weren't awful, just not white.  I'm trying to get this place as bright and white and clean looking as I can and leaving the ceilings beige just wouldn't cut it.

I also found out the trim is not white!  As soon as the ceiling was painted white, the crown looked beige.  

Yes, I just bought white trim paint!!! 
Ceilings are a giant pain in the neck to paint and several of ours are where everything is located.  Vents, sprinklers, recessed lighting and exhaust fans!  I thought I would never finish, but alas, I did and .......boy, was it worth it!  It made a huge difference!!!


Too many irons!!!

We have officially been in our new place for two weeks today!!!  I do love it, but there is soooooo much to do.

Every room needs work, but I can't seem to stick to one room at a time.  There are small transformations taking place in every room of the condo, making me feel like I have "too many irons in the fire"!!!


Can you see the texture?
The dining room has painted/textured walls with stripes and not a stick of trim.  I don't have pictures of the process, but I did get the texture sanded off with an orbital sander.  What a messy job!  I draped plastic drop clothes over the doors, but I still got a huge layer of dust! 

Now I just need to add trim.  Crown, chair rail and a piece that creates a raised panel look.  Some folks like to call it shadow boxing. 

Wish me luck!  I've borrowed all the tools and purchased the trim.....not cheap, btw....and most importantly, I've watched lots of youtube videos!  This should be a snap! 

I'll let you know how it goes and post pics as soon as I get into it!

Now off to tend to another iron!

Very best painting tip!!

I have a painting tip for you that I think is AMAZING!!!  It's also an original!  I may not be the only person doing it, but I discovered it on my own!

You know how quickly paint starts to dry in a brush, tray or any other place you would like it to not dry in.

Here's the scenario...you're painting a room and you've just finished cutting-in (that's painter's lingo for doing all the edge work).  Now you need to put the brush, and whatever small container you're using to hold your paint for cutting in, down for the entire length of time it takes to roll the walls.  How do you keep the brush from drying out and the small container from skimming over???


Just press all around the roller and it's airtight!!!  It will stay wet a very long time!!!


Glad makes a product called Press 'N Seal that has a sticky side.  It will stick to almost anything, especially itself!  Just tear off enough to entirely cover your brush or roller or whatever and seal away!

You can come back a week later and use the same brush, roller or container of paint! 

You're welcome!


Thursday, April 17, 2014

Paint my ceiling fans???

      It's now been a week since we moved in and I haven't had an extra minute!  There's sooooooooo much to do and soooooooo much more I want to do!


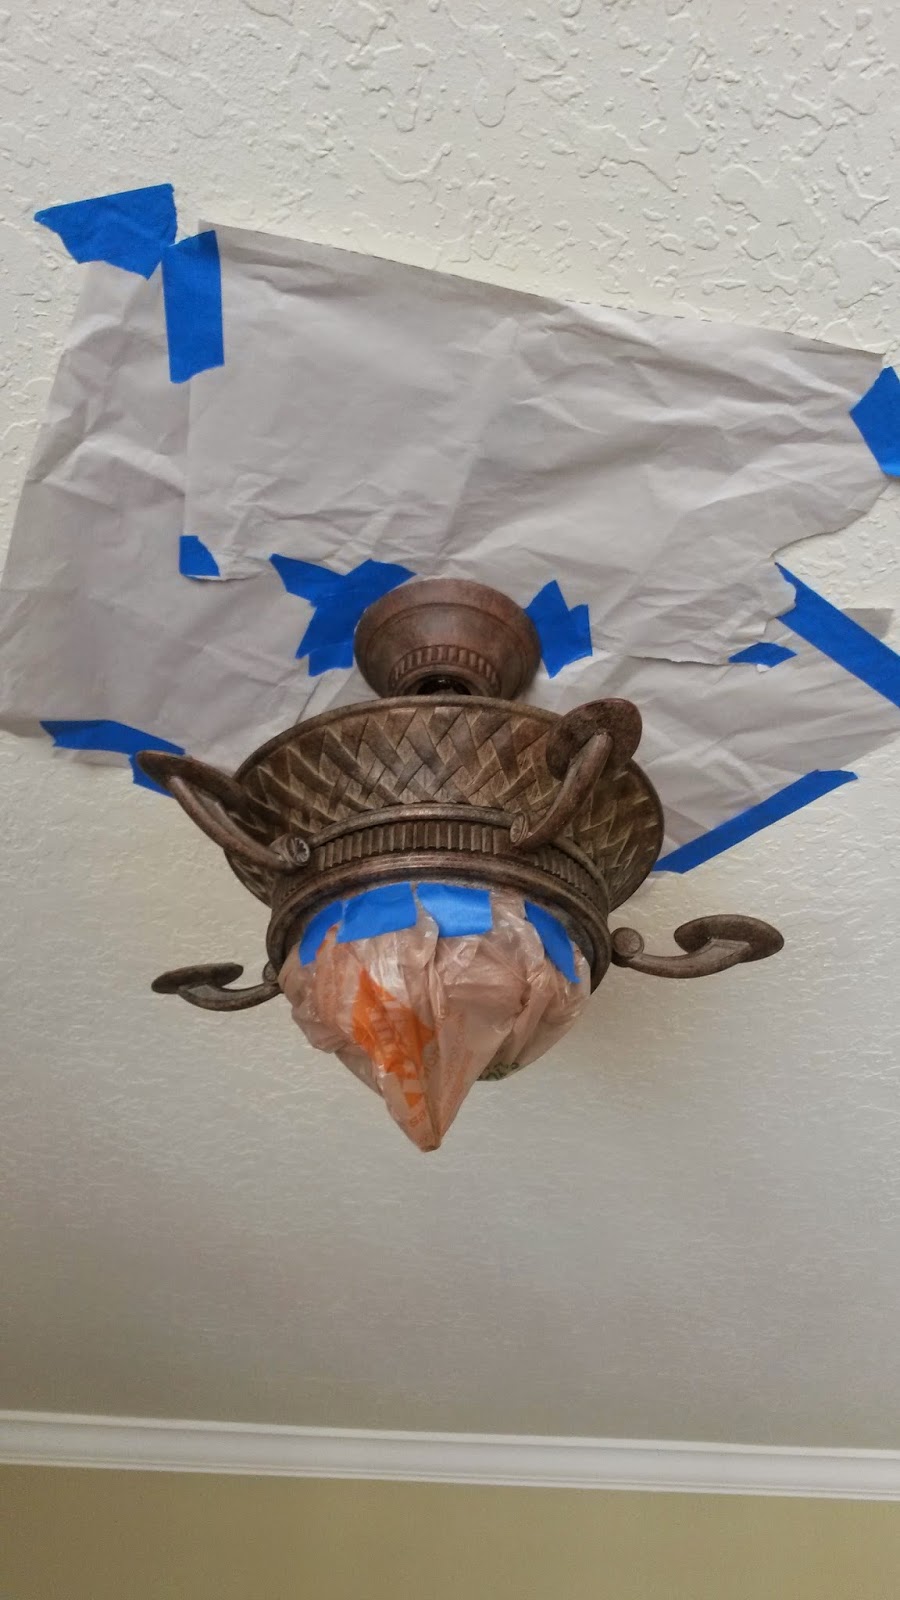
I took the blades off and taped the rest.
The first thing I wanted to tackle was the ceiling fans and ceilings.  The fans are nice, but they were just the wrong color.  I had read on Pinterest that you can spray paint ceiling fans and one post I found said it could be done while they hang!!


Before I go any farther, let me warn you!!!  I would NOT do this if I wasn't going to paint the ceiling, paint the walls and had empty rooms!!!!!


Maybe more paper on the ceiling!
The over spray from spray paint turns to a type of dust and falls to the floor.  I had covered the floors from wall to wall and also taped paper on the ceiling, but I still had a mess to deal with.  I got paint on the ceiling and the "dust" on the drop clothes ended up on the floors when I cleaned up.  Maybe I could have done a better job of containing it, but instead I vacuumed and mopped.....a lot!


All painted!


The small parts taped to a box.


Finished!!!  Looks great!


The paint I used.

I didn't prime before painting, but would have if it had been something we would be touching.  I think it turned out great!!!

Monday, March 31, 2014

The Setting

The main entrance.


Let me set the stage before the actual "play" begins.  Here is the front of our condo building!  Isn't it beautiful??  I love the European charm of it. 

We actually moved in 2 years ago, when we sold our last place.  We weren't sure what we were going to do next, so we decided to rent for a while.  The Mayfair had a small unit on the 7th floor available, so we jumped on it.  We had looked at units in the Mayfair complex before, while shopping for a condo to buy, but didn't find anything that was perfect.  We also didn't think our rental time here would be very long.

After a year here, we realized we probably aren't leaving Atlanta any time soon and we also realized how much we like living in the complex.  The search for a place to purchase...a much larger place.....began.


The side courtyard.  See the bldg in the background?  We used to live there!

A full year later, we found a 2 bedroom, 2 1/2 bath unit on the 26th floor.  After all the negotiations that go in to buying a home took place, we were under contract and we close on it TOMORROW!!!!!!!  Tomorrow.....finally! 

Tomorrow, I get to start making the transformation of this new home for us and I CAN'T WAIT!!!!!

-I'm off to Home Depot. 


Just one before picture today...it's the dining room with paint that looks like paper (and lots of texture I get to sand off) and a light I look forward to replacing.  It's hard to tell, but the floors are great!!


Thursday, March 27, 2014

My obsession.


I'm obsessed.  I've only been to Paris twice, but somewhere along the line, I became a certified Francophile.  It sounds silly, but there's a name for it.  There's no Italiaphile, Amsterdamophile or Mexicophile.  Just Francophile.

The reason for this blog is to document my effort to create my own Pied a Terre in Atlanta, Ga.  After living in very contemporary building, we are buying a condo with more of a european personality.  Decorating is one of my passions.....so, while lying awake "dreaming" of how I could decorate this new place, it occurred to me that I could try and create that Parisian apartment feeling. 

I think pied a terre translates literally to "foot of earth", which makes sense because Parisian apartments are mostly tiny, especially compared to Chateaus outside the city. 

How do you create a french apartment, you ask?  The recurring elements are the light wood floors and pastel walls with lots of trim work.  Some of the trim work is very old and ornate.  Both of these things can pretty easily be duplicated here and I got VERY LUCKY with the floors.  I just need to add a lot of moulding to the walls and paint, paint, paint. 


The last element that distinguishes a Parisian apartment seems to be the light.  Natural light.  Natural light that comes through those amazing floor to ceiling "french door" windows.  Okay, I don't have that, but I do have windows, so we'll see. 


I have some ambitious plans for the new place...most of which I hope to do myself!!  Check back for before, progress and after pictures.

Au revior!