Tuesday, April 29, 2014

New lights, new paint!!!!!!

I wish the lights were closer to the mirror.  Another project?

 
I got my new bathroom lights and got the walls painted!!! 

My last post showed you the super fancy lights and lovely paint treatment that I couldn't wait to change.  I wanted the walls to be a pale blue and was afraid of getting a color that looked like a baby boy's room.  My last blue bathroom was Rhino by Behr, which is the same as Restoration Hardware's Silver Sage.  It was pretty, but too dark for this room.

I love the color Silver Drop by Behr, but it's almost no color at all, so I took a gallon of  that and added a sample size of the Rhino to it!  I love it!!!

It's amazing how much nicer the marble and cabinets look with the new wall color.  I never get tired of how color changes things!

I still want to get rid of all the gold in this room.  The shower door hinges and door bar would have already been replaced if they weren't over $200!  They will wait! lol 

Now to go paint something else........


New towel bars and placed over the toilet.
New pic in place of old towel bar.  You can see the color better here.

Friday, April 25, 2014

Men are stupid!

I don't have pictures of my forehead and I may not have actually gotten bruised, but the lights in the master bathroom are dangerous!!! 


The placement of the lights is just bad.  They are too far away from the mirror on the side walls, so that when you lean forward to apply makeup, they are behind you.  Some stupid man made that call.  I bet his mascara is always a mess!!


Okay, not only are the lights in a bad location, the ones in this place protruded from the wall about 7 inches.  Who does that?  Every time I washed my face or put my contacts in, I hit my head on them!!! 


Have I mentioned that were just my style?  No?  Here's why.....
 
Oh my!

Um, yea.  Not for me.  Also take a look at this paint.  It wouldn't be bad, if it wasn't almost exactly the same color as the marble and cabinets in the room.  I can't wait to paint over it!  The next picture shows the light from the side, showing the danger I face.....get it?  Every time I wash my face! You can also see the marble color over the tub.  I love the marble, but it just dissapears with this paint color and treatment.  See my blue tape?  I'm ready!!!


Only a man would place lights here and I'm going to assume it was a man that picked this one out

Friday, April 18, 2014

First things first!


See the difference in what the ceilings were and what they are now? 
The first thing I needed to tackle in our new place was the ceilings and fans.  I posted about painting the ceiling fans, if you missed it click here.  Once those were done, I started on the ceilings.  I did most of them before we actually moved in.


They weren't awful, just not white.  I'm trying to get this place as bright and white and clean looking as I can and leaving the ceilings beige just wouldn't cut it.

I also found out the trim is not white!  As soon as the ceiling was painted white, the crown looked beige.  

Yes, I just bought white trim paint!!! 
Ceilings are a giant pain in the neck to paint and several of ours are where everything is located.  Vents, sprinklers, recessed lighting and exhaust fans!  I thought I would never finish, but alas, I did and .......boy, was it worth it!  It made a huge difference!!!


Too many irons!!!

We have officially been in our new place for two weeks today!!!  I do love it, but there is soooooo much to do.

Every room needs work, but I can't seem to stick to one room at a time.  There are small transformations taking place in every room of the condo, making me feel like I have "too many irons in the fire"!!!


Can you see the texture?
The dining room has painted/textured walls with stripes and not a stick of trim.  I don't have pictures of the process, but I did get the texture sanded off with an orbital sander.  What a messy job!  I draped plastic drop clothes over the doors, but I still got a huge layer of dust! 

Now I just need to add trim.  Crown, chair rail and a piece that creates a raised panel look.  Some folks like to call it shadow boxing. 

Wish me luck!  I've borrowed all the tools and purchased the trim.....not cheap, btw....and most importantly, I've watched lots of youtube videos!  This should be a snap! 

I'll let you know how it goes and post pics as soon as I get into it!

Now off to tend to another iron!

Very best painting tip!!

I have a painting tip for you that I think is AMAZING!!!  It's also an original!  I may not be the only person doing it, but I discovered it on my own!

You know how quickly paint starts to dry in a brush, tray or any other place you would like it to not dry in.

Here's the scenario...you're painting a room and you've just finished cutting-in (that's painter's lingo for doing all the edge work).  Now you need to put the brush, and whatever small container you're using to hold your paint for cutting in, down for the entire length of time it takes to roll the walls.  How do you keep the brush from drying out and the small container from skimming over???


Just press all around the roller and it's airtight!!!  It will stay wet a very long time!!!


Glad makes a product called Press 'N Seal that has a sticky side.  It will stick to almost anything, especially itself!  Just tear off enough to entirely cover your brush or roller or whatever and seal away!

You can come back a week later and use the same brush, roller or container of paint! 

You're welcome!


Thursday, April 17, 2014

Paint my ceiling fans???

      It's now been a week since we moved in and I haven't had an extra minute!  There's sooooooooo much to do and soooooooo much more I want to do!


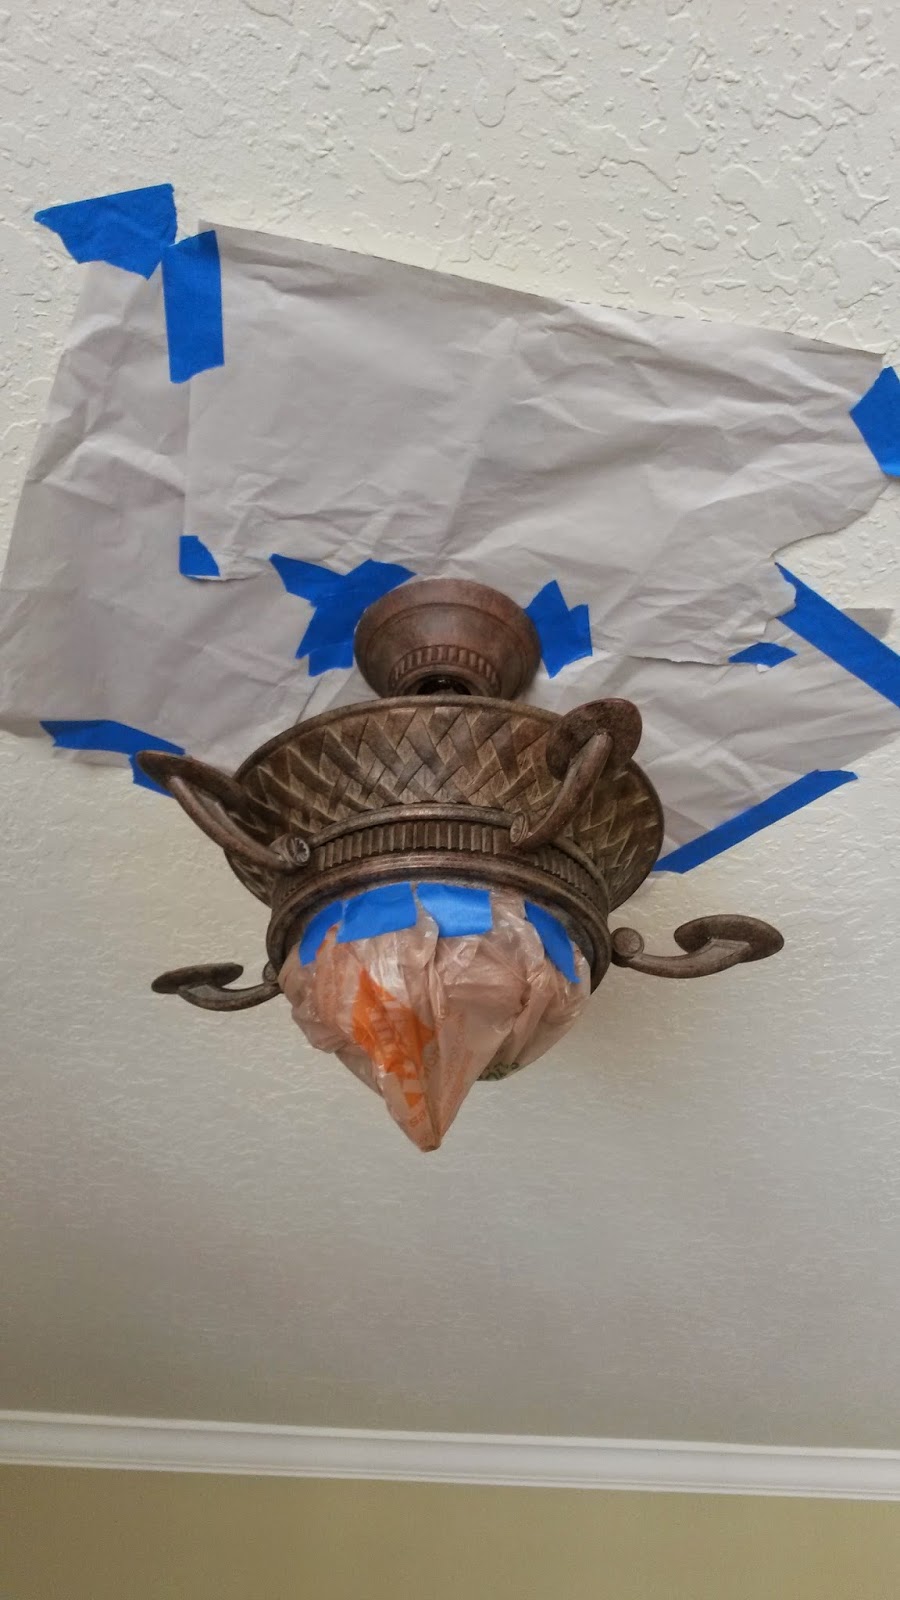
I took the blades off and taped the rest.
The first thing I wanted to tackle was the ceiling fans and ceilings.  The fans are nice, but they were just the wrong color.  I had read on Pinterest that you can spray paint ceiling fans and one post I found said it could be done while they hang!!


Before I go any farther, let me warn you!!!  I would NOT do this if I wasn't going to paint the ceiling, paint the walls and had empty rooms!!!!!


Maybe more paper on the ceiling!
The over spray from spray paint turns to a type of dust and falls to the floor.  I had covered the floors from wall to wall and also taped paper on the ceiling, but I still had a mess to deal with.  I got paint on the ceiling and the "dust" on the drop clothes ended up on the floors when I cleaned up.  Maybe I could have done a better job of containing it, but instead I vacuumed and mopped.....a lot!


All painted!


The small parts taped to a box.


Finished!!!  Looks great!


The paint I used.

I didn't prime before painting, but would have if it had been something we would be touching.  I think it turned out great!!!